Saturday, January 30, 2016

2K primer and yes, its fathom green!

The Texas late January temps are in the high 60s/ low 70s so I couldn't pass up the opportunity to primer the beast.

Total cost with paint, booth, supplies is just over $500.  This is near a may -co cost of a quickie acrylic that may last 5 years kept in a garage and pampered. 
I though- am using single stage urethane that is basically really industrial shiny tractor-like paint.

 Did you guess the color picked from the last post?
http://jims73mgb.blogspot.com/2015/12/the-final-panels.html
I'll give you a hint, it's green, but not from Britania.  Sorry Charlie.

**Notes:
  ** use a respirator- this stuff has crap in it that will make you stupid or give you cancer or both!
Wear a tyvek suit and gloves to keep this crap off of you.  You don't need to drink it to get it into your system and do damage **

If you have rattle canned a vehicle or chair or whatever you will have the very most basic, general idea down on spray technique.  Also go to you  tube and check out how to paint from different sources, each will give you pointers on spray pattern, technique  mixing, etc...

**have everything set up before you think about mixing paint.** 
I had 2 compressors hooked in unison through a air filter and a moisture filter then set the gun to shoot between 30 to 40 psi with the trigger pulled.  Then all I would have to do is set the spray pattern and trigger pull while in the booth.

My primer said it had a pot life of 3 hours, I gave it 2 just to be on the safe side. 
  The first paint mix and set up is a bit tedious trying to get all the parts mixed the right way.
Mine was a 4:1:1 mix meaning 4 parts primer (mix the hell out of it every time you open the lid)
to 1 part reducer, to 1 part activator ( also known as catalyst , hardener)

This mess is mixed in a graduated paint mix bucket (get more than you need), poured through a strainer (If you think you need 3 strainers- get 6!) and into the paint gun. 
Get the $9 stand that holds the gun and strainer- worth every penny!

Go in the booth and spray the plastic wall or a sheet of paper to get the pattern down and to see if it is runny, too concentrated, or both.  The runs will happen here instead of on the car.

There is a flash time (mine was 10 to 15 minutes) that must be observed between coats, this allows the nastys to evaporate and leave the primer where you sprayed it.

The 10 to 15 minutes between coats while mixing a new batch of paint is just enough time to strip down the gun and clean the paint out of it before it sets up.  Do it - or have blotches and runs and drips on your car!

I did 3 coats that took about 1.5 hours.
It took 1/2 gallon of primer,  and a quart of hardener and a quart of reducer.
The 20 oz (600cc) spray gun would do about half the car on a heavy setting.

I will re tweak the spray booth for final paint to have more airflow with a finer filter, but it worked pretty good.

Can't even see where the cow molested the car in the field can ya?

No its not zz top, the hood was balanced so I could reach all of it.

This thing may turn out fairly straight after all of this...

I sprayed the trunk surround and the second coat put the "boot" back in place
BEFORE: What it started out as...In late November or December

AFTER:  a grey masterpiece.  Not masterpiece, maybe a beginners gallery showing.


harbor freight paint system... Eh- it works.
$47 for gun kit with 1.8 tip, 1.4 tip and a 1.0mm touch up gun.
  Paint mask worked great. $16,  extra air fittings $6, new hose for booth only $17,
wire brushes for gun cleaning, $2, and other stuff.    Total $120

When I opened the paint box, I found there wasn't any reducer for the primer.  The nason was a o'reilly special order for
$40 extra bucks over the $220 for the paint and primer.

Wednesday, January 13, 2016

Check your water passages, paint prep update

I have started making a plastic sheet/pvc tube paint booth for the garage.
Top hanging tube is 1", bottom skirt holder is 1/2" diameter because all it does is keep the plastic from flapping with the positive pressure. 
Also got a 35K BTU propane shop heater to warm the car before painting

Just got the car in acid etch primer, still finding dings here and there that didn't show after bare steel sanding.  Body work is rewarding, but sucks.

I will test the painting waters by doing the trunk, under trunk lid, engine compartment, and underhood to test the sprayer out with the 2K primer first.


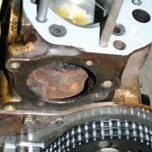
Date clock on the head, The other is near/under the oil filter area on the block

The engine got silicone side engine gaskets, poly for valve cover bolts, and while putting on the water pump I found that there was a bunch of crud in the outlet hole that goes to the head that I had to scrape out/blow out.  Could have been why it heated up so fast last time it was running.


DID YOU KNOW...
That the far right hole (3:00 position) in the block goes
straight up to the hole the red straw is in?
Mine was solid, just like the bolt hole behind the distributor.

See below, the coolant passage is next to the front head stud

This one was completely clogged with rusty yuck , so it got snaked and
blown out from both sides. There was a fountain of rusty yuck coming out of the thermostat bolt hole.  
There is also a tiny hole between the head and block (about the size of the straw)
under the left side of the thermostat on the bottom of the head. Make sure it isn't crusted over.

I used copper anti seize on everything being re assembled.

Tuesday, December 22, 2015

British (rusty) Steel!


I had tried evaporust, but it was at or below the 65*F they recommended and didn't work too well
  I will try it on other things when it gets warmer
The yellow streaks are rust being eaten by the acid.  Boy does it smoke.  The fumes will
knock you the __ out, so wear a respirator , goggles, and gloves.
This took several wipes of acid to totally clean it.


Heres the hood sans rust.  If you don't dry off the hood immediately after
rinsing the acid, it will flash rust as you watch.
 
self etching primer thrown on.  Also used as a wet sanding guide coat to find imperfections. 
 

Heres some imperfections.  Where the tarp laid on the hood, pitting.
After the wet sanding with a foam board and hammer and dolly.
A lot of places could be flattened, but these areas needed a skim
of the old pinkish filler material.

Sunday, December 20, 2015

the final panels....

Its not like they're completed, its just the last 2 to strip before sanding filling, priming etc...

Heres the "bonnet" in all its beauty.  Dents , dings, and waves galore.

The 3m stripping wheel is getting a workout.  I'm gong to pick up some rust converter for A LOT of pits in the metal. Every dent and part of the newer paint job that dissipated has pits under them.
The hood will get some body hammer work... Note the crater in the center of the hood.  Right under the support.

Here is the trunk lid.  It came out super shiny with nary a dent.  The only surface rust was at the inner bottom under the trunk lock- showing it was leaking.  Again- rust converter to the rescue.
  All of these will get self etching primer,  then after a day or so of drying, guide coat wet sanding, and red scotch brite before shooting high build primer.  

Did I mention I already got a gallon of paint for it?


Guess which one

Thursday, December 10, 2015

1800cc of envy

So while doing bodywork, I started to realize how "bad" the lump was looking.  I never got into the chromed out engine compartments, I'd rather spend money on things that make a vehicle more reliable.  Chrome don't get you home after all...
The nylon wheel on the drill revealed the rest of the mystery sticker on the valve cover.  Presently the only kenspeed found was Tampa and LA.

Here is the beautiful and meticulously clean valve train. 

After an hour of brushes, screwdrivers, brake cleaner, engine degreaser, and simple green, here's the naked lump. Original markings??

The paint came off way too easily on the valve cover.  I just kept going with a nylon brush and it shined up nice. Then I put a coat of clear sealer over it.

Here's the lump after paint. I also clear coated the block side covers.  Now to get new gaskets for everything removed.

Monday, December 7, 2015

CrAcK oF dOoM fixed!


 So while finishing up the LAST BODY PANEL, yay,  I discovered the  CrAcK oF dOoM on the passenger door. Sure it's small now, but it just gets bigger. Why on the passenger side and not the drivers, I dunno.
So I got a piece of 20ga sheet steel and cut a chunk out.

 I missed the picture of the holes, but I drilled the end of the crack to stop its progress.  Then I went nuts and drilled 7 other holes .
 The patch piece went under this, held by a magnet until the first weld went on.  I pressed the patch to the backside with a screwdriver then welded away.
The bodywork, even on a low welder setting , welded odd by melting unless I let the tacks cool before filling in the plug welds.
Here's what all of this is leading up to... The front "wings" are back on and the seams are straight.

Friday, December 4, 2015

Progress as promised, More bodywork

I finally got some time (about 7 hours over 2 days) to get on with the bodywork.  Even with my humble settings and hand tools, I feel like the B is getting much closer.
I got jiggy with the palm sander and wire wheel on the drill.  Here's the drivers side sanded down. (far side for you RHD purists)
The acrylic repaint was completely gone on spots down to original primer, but the bottom of the door and fender wouldn't sand off!

Guess this car part.....
It's a view from above the rear fender at the taillights.  You can see how the respray cracked and flaked then got chalky .

This is the cowling between the trunk boot and the cab.  When purchased it still had what was left of the top in the upright position with a tarp over the whole thing. It also had a blue cover on it that helped hold in rainwater. Thus- pitting.  Sanded it down and hit it with rust converter.


I have to give credit to my helpers..a rigid hammer drill with a 3M grinder that powers through paint and bondo, a Hitachi drill with a wire wheel for corners, and what's left of a black and Decker 1/4 sheet palm sander.

This is the rear trunk boot valace.  it was muy dented, warped, and wrinkled- but with a hammer and dollie set it's pretty flat now.  The bondo on the lower right is part of a boo boo to the right taillight area.  Minor bondo needed after hammering.

And the worst panel on the car. It seems that somebody backed into the tail light area a little.
It was under the side marker light And towards the taillight about a 1/4" 6mm deep. And whoever knocked out the bodywork use a framing hammer and about 5 pounds of bondo.
Again after hours of grinding off the bondo , hammering and guide coating and more hammering, and more guide coating, and hammering, and ... it's acceptable looking and even looks good at 10 feet.  It will just need a skim coat of filler to make it flat vs 1/4" of bondo.

Getting closer to full primer...