Fathom green, that's the color.
It was popular in 60s early 70s chebbys, dark mossy green with tiny flecks in it. And a pain to paint with though.
Sitrep:
Temps high 60s low 70s.
Have compressors hooked up,
Have fans and new filters.
Have time.
Ready to paint right?
Yes and no.
The mix is 8:2:1
That's 8 oz paint to 2 oz reducer/thinner to 1 oz wet hardener.
H.f. "pro "paint gun, New moisture filter.
I tried mixing half a batch of the "starfire s.s. urethane" to try out my prowess with real paint since the primer went so awsomely.
I got spitting and more of a wall texture/ micro truck bed like coating. This stuff is pretty forgiving, as long as it was still wet and enough went on it flowed the globs & blobs together nicely.
Only comparison I have is to a high quality spray can. The cheap ones are thin and run and the better ones have more pigment and bonding properties.
Since I tried it out on the trunk and underhood first I let the defects stay there until it gets figured out.
Next mix I did a full batch and added an extra ounce of reducer to get more of a liquidy flow w/o problems. Initially it shot great
And after stopping and repositioning the spitting started happening some again.
The second compressor wasn't coming on when it was supposed to so air was low and the 25 gallon was working its a** off. I was able to shoot for max 20 seconds before I lost pressure and it came back on.
So I'm in the process of trying to get the mix right, fan pattern has little effect on it, air flow probably needs more, paint flow /trigger pull has some effect on the spitting.
Mtf...
I have gotten some indication that there is more need for airflow mainly, needing to keep the gun a constant distance from the panel, not thinning the paint too much, not under thinning it.
Its a confusing balance. Anyway I need another big compressor for airflow.
Friday, February 12, 2016
Wednesday, February 3, 2016
Dash fix. Fixed. V2
Being thrifty like I am, I saw a product from urethane supply co. That was meant to full in dash cracks, and boy does this have them.
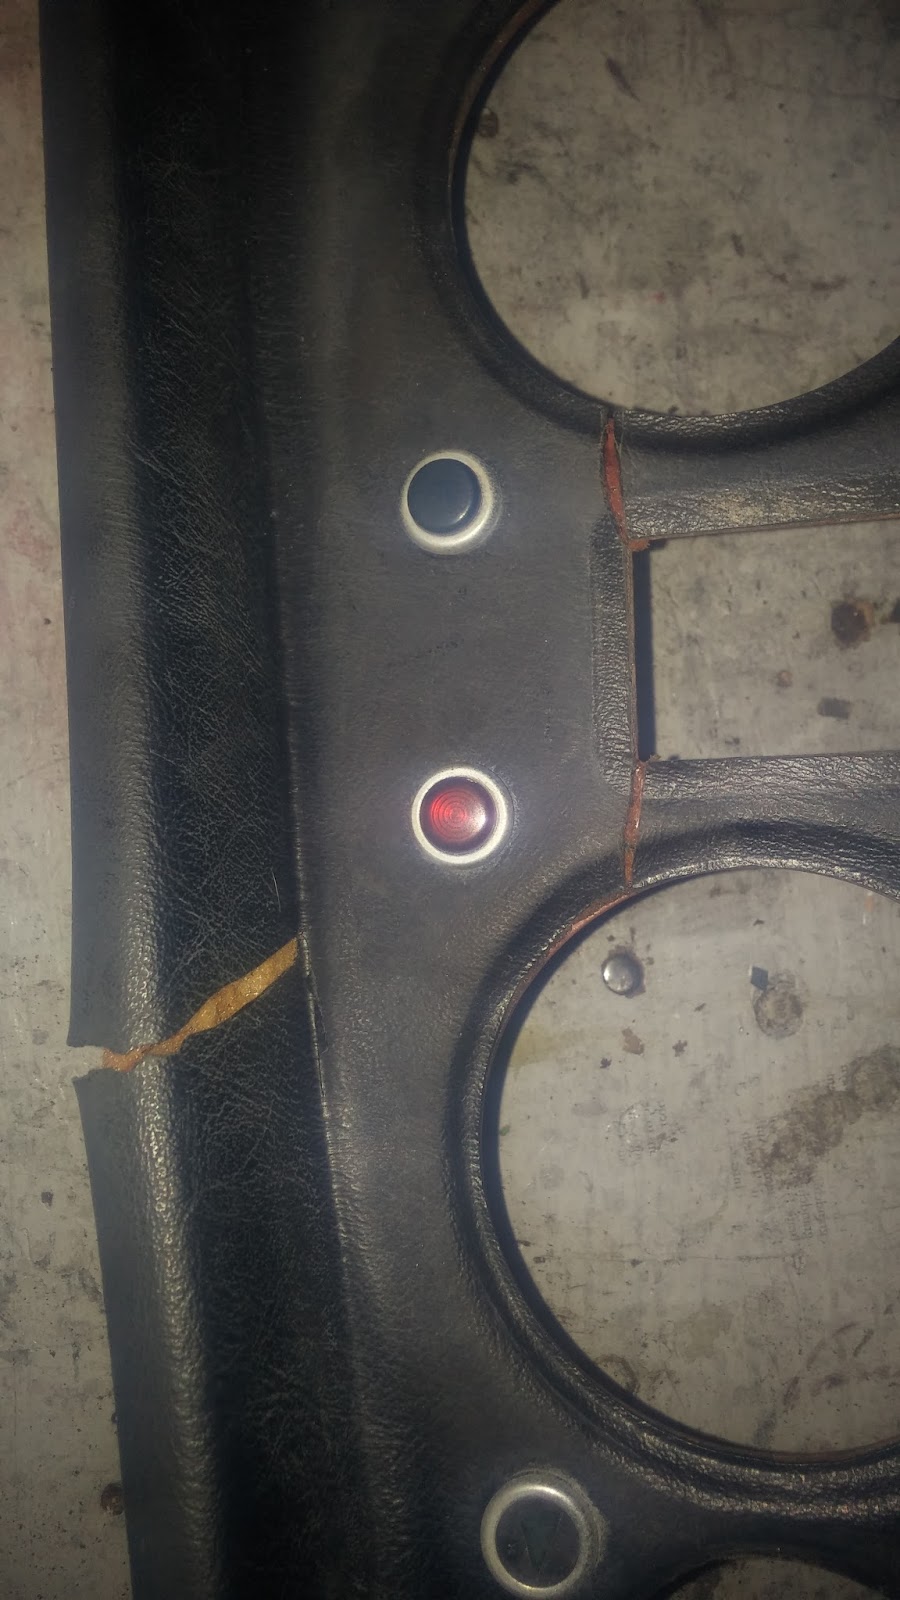 |
| Here is the main problem, between the oil, speedo and the tech gauges there is a crack in the vinyl. That's it on the front of the dash. |
 |
| The ugly crack. There was more vynil stuck to this but I didn't get a beginning picture. |
 |
| But on the top.... Cracks galore. After chipping vinyl, the bad foam has to come out. One hole is 1/4" deep. |
 |
| I started pushing in with my thumb in outwards circles from the cracks until the dash top stopped cracking. One spot got huge. Then I took a dremel and ground down the edges so they weren't jagged and curled up around it. |
I looked on the bimmer forums and a trans am forum , and they were both happy with the results. It gets sprayed with s.e.m. coating afterwards. If this $17 fix doesn't work, then it gets a $60 dash cap... Still not $329 for a new dash cover.
 |
| After it dries, it gets 150 grit sanding to general form, then 325. Update later.... |
Update 2-5
 |
| All of this beauty from an 8 oz can. Sands amazingly flat and feels more plastics than regular bondo. If you mix the putty oo "blue" this stuff sets up quick. The best mix color is little old lady silver/blue hair color. I'm coining that phrase. |

Another update coming after final sanding...
And here's the finished product.
 |
| After a wipe down with degreaser from the paint, I shot it with the SEM coating. Amazing stuff. |

 |
| Here's the offending crack after the fix. I know it was (is) there, but you have to look for it. |
Subscribe to:
Comments (Atom)